
Please select a topic below for step-by-step instructions.
Basic
New Users – Getting a Zoom Account | Logging into Zoom
1. If you don’t have Zoom installed, go to: https://zoom.us/download#client_4meeting to download and install the Zoom desktop client program for Mac, Windows, ChromeOS and Linux, as well as the Zoom Mobile App for iOS and Android. The Zoom desktop client does not require administrative rights to install. However, if you are prompted to enter administrative credentials to install the Zoom client on your university-owned device, please contact the OIT Help Desk by creating a work order at https://helpdesk.vsc.edu or email us at helpdesk@northernvermont.edu
2. Logging into Zoom – if you don’t have a Zoom account yet, this process creates your Zoom account. Also use these steps to sign into Zoom in the future.
3. Either double click the Zoom icon on the desktop, or search for the Zoom program.
4. Click Sign In (if you don’t see Sign In, you’re already signed in and need to sign out. To sign out: click the profile icon in the upper right corner, and click Sign Out.)
5. Click Sign in with SSO
6. Type in: vsc for the Company Domain (if prompted for a Company Email Address, please type in exactly this form of your email address: username@vsc.edu)
7. Click Continue
8. Login to the Portal with your VSC username and password
9. If you’ve never signed into Zoom before, you may be prompted to confirm your email address. Please check your NVU email for an email from Zoom. Check your Spam/Junk or Clutter folders if you don’t see this email in your Inbox. Click on the link in the email to confirm your email address.
Faculty and Staff
All VSC faculty and staff are provisioned with a Licensed VSC Zoom account, providing unlimited meeting lengths, and up to 300 participants per meeting. Your VSC Zoom account username/email address takes this convention: username@vsc.edu (e.g. abc01230@vsc.edu). Any other form of your VSC/NVU email address is NOT tied into a VSC Zoom account. Please double check you’re using username@vsc.edu
Students
Students do not require a Zoom account to attend Zoom meetings, only the host (i.e. instructor) needs a Zoom account. Students can login to Zoom following the instructions above. This will, by default, provision the student’s Zoom account with a Basic account (i.e. a 40-minute limit to host Zoom meetings, no cloud recording, etc.) Please contact the OIT Help Desk by creating a work order at https://helpdesk.vsc.edu or email us at HelpDesk@NorthernVermont.edu if you are a student needing to host a Zoom meeting and need a Licensed account.
Existing Zoom account
If you’re a faculty or staff member, and you have an existing Zoom account (whether personal or associated with another institution), be sure you are logging out of that account and logging into your Licensed VSC Zoom account to have the benefits of your Licensed VSC Zoom account (including integration with Canvas and YuJa). See the Am I logged into a Licensed VSC Zoom account? below to determine if you are logged into your Licensed VSC Zoom account.
Am I logged into a Licensed VSC Zoom account?
First, follow the Getting a Zoom Account instructions above to sign into your Zoom account. Then, on the Home window, click on the profile icon in the upper right-hand corner of the window, next to Search. You will see the word LICENSED and it will display part of your Zoom username with @vsc.edu Both of these confirm that you are logged into Zoom with your Licensed VSC Zoom account.
If your username ends in anything other than exactly @vsc.edu, such as @nvu.vsc.edu or @northernvermont.edu, then you are not signing into Zoom with a VSC Zoom account. All Zoom accounts only use usernames ending in @vsc.edu Click Sign Out at the bottom of the Profile menu to sign out of a Zoom account.
Making Sure you’re Ready to use Zoom
Preparation is key to being ready to use Zoom.
- Start Zoom early to give you time to test your audio and video, and make sure it is working and set up properly. Join Zoom’s test meeting: https://zoom.us/test
- Use headphones or earbuds with a mic if possible to avoid background noise
- For best results, is it recommended to use a desktop, laptop, or tablet.
Review Zoom’s system requirements.
Troubleshooting
Testing computer or device audio
How do I test my video?
Start Zoom Meetings as Host – Integrate with Canvas
There are a couple different ways to start Zoom meetings as a host.
Integrated with Canvas
Starting Meeting from Zoom Client
After signing in to the Zoom client, you will see the Home tab, where you can click these options:
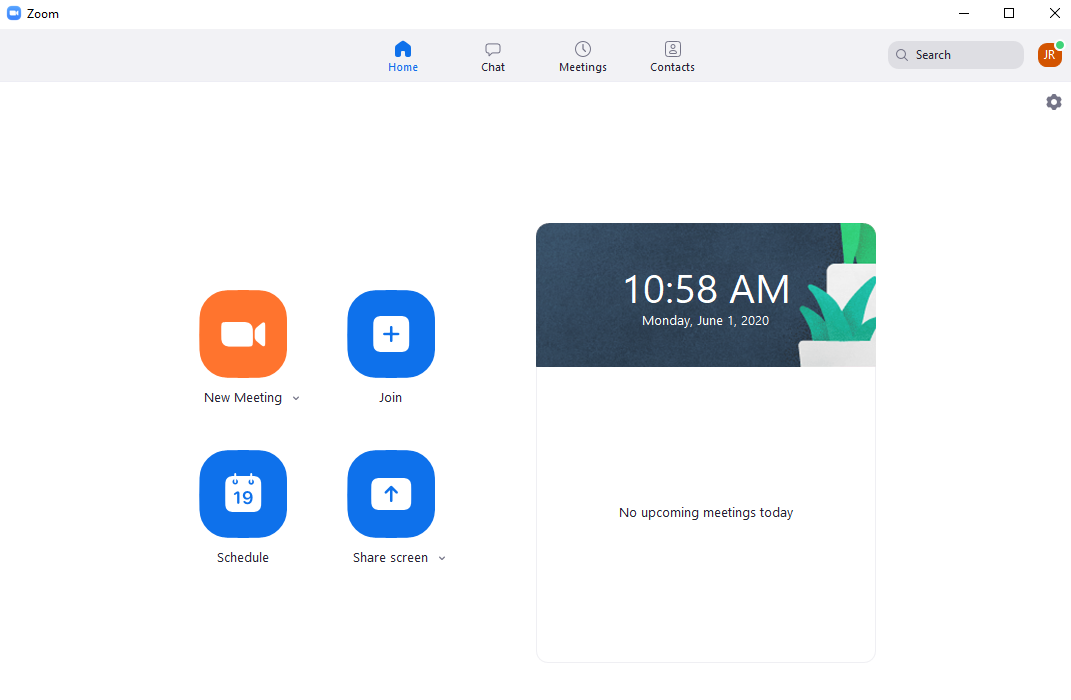
- New Meeting: Start an instant meeting. Click the downwards arrow to enable video or use your personal meeting ID (PMI) for instant meetings.
- Join: Join a meeting that is in progress
- Schedule: Set up a future meeting.
- Share Screen: Share your screen in a Zoom Room by entering in the sharing key or meeting ID.
- Date and time with background image: To change the background image, hover over the picture and click the camera icon.
- Upcoming meeting: Displays the next meeting for the current day. Add a third-party calendar service (such as Outlook) if you want to sync upcoming meetings.
Join another user’s Zoom meeting
There are many ways to join a meeting, but the easiest way is to click the join link that the meeting host provided. You can also click Join in your Zoom client and enter the meeting ID. 
How do I share my screen?
First, ensure that you’re logged into Zoom (see Am I logged into a Licensed VSC Zoom account, above), as by default, Zoom only allows screen sharing by the host of the meeting (i.e. one is the host only after logging in). Then, please refer to Zoom’s documentation: How do I share my screen?
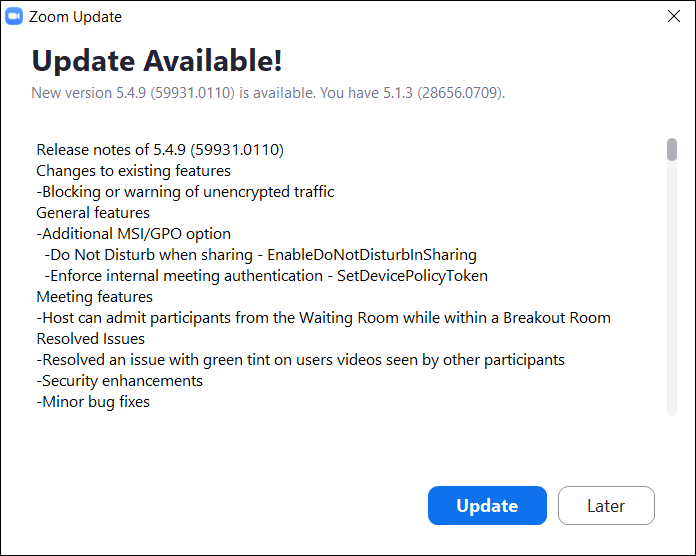
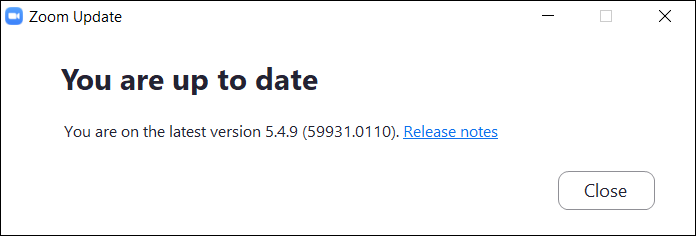
How do I check for updates to Zoom?
First, follow the New Users – Getting a Zoom Account to sign into your VSC Zoom account.
Then, on the Zoom program itself (not the website), click on your profile icon in the upper right of the Zoom Home window, next to search. In the menu that opens, click on Check for Updates. If Zoom needs an update, it will prompt you. Click Update to update. If Zoom is up to date, it will also tell you; click Close.
Advanced
Allowing attendees to share their screen
Due to increasing security concerns of uninvited guests accessing public online meetings, Zoom has turned off the default setting that allows meeting participants to share their screens without needing the host’s permission for all education customers. Hosts can still allow meeting participants to screen share via one of these three options:
- Selectively allow individual meeting participants to share their screen when a meeting is in progress. To do this, while you are in the meeting, open the participant list (click “Participants”) and hover your mouse over the name of the person you want to allow to screen share. You should see a “More” button. Click More and select “Make Co-Host” from the dropdown. As a co-host, that individual will have permission to share their screen.
- Selectively allow all meeting participants to share their screen when a meeting is in progress. To do this, while you are in the meeting, click the arrow next to your “Share Screen” button, and then select “Advanced Sharing Options” from the list that pops up. In the Advanced Sharing Options window, select “All Participants” under “Who can share?”
- Click the security button along the bottom and click Allow participants to: Screen Share.
Changing the video layout (Active Speaker View and Gallery View)
Please see Zoom’s documentation: https://support.zoom.us/hc/en-us/articles/201362323-Changing-the-video-layout-Active-Speaker-View-and-Gallery-View-
Selecting microphone and/or speakers
Sometimes, it is necessary to change the microphone and/or speakers that Zoom is using. This may be because the currently-selected devices are not working, or the room is equipped with multiple, selectable, microphones and/or speakers.
1. Click the small arrow next to the Mute/Unmute button in the lower left.
2. Select a different microphone or speaker from the list. The selected device has a checkmark next to it. You may have to repeat this process until you find a device that works. Use the Test Speaker & Microphone option (below) to ensure both your speakers and microphone(s) are working before your meeting.
How to Secure your Zoom Meetings
The simplest way to secure your Zoom meeting is to enable a passcode (previously referred to as a “password.” It’s important to make a distinction between passwords (that should never be shared) and passcodes (which are intended to be shared). This simple yet effective method will prevent users with solely the meeting ID from joining unless they have access to the Zoom invitation that you sent. Important: A meeting link (URL) that is long with a lot of seemingly random characters at the end of it automatically includes the passcode as part of the link. When a meeting has a passcode, if the last part of the link with seemingly random characters is omitted and the link is only shared with the meeting ID, the participant will be prompted to enter the passcode.
Remove an Unwanted Participant: In the unlikely event that an uninvited “guest” joins your Zoom meeting, you can use the Remove Participant option under the Security button in Zoom to expel them.
Security Guidance for Zoom Meetings:
- Use a randomly generated meeting ID and passcode
- Schedule Zoom meetings from within Canvas
- Do not share Zoom meeting links on social media. Anyone with the meeting link can join the meeting.
- For sensitive Zoom meetings, only allow authenticated users (i.e. attendees with a Zoom account)
- After everyone has joined the meeting, lock the meeting
If you would like to manually admit attendees to your meeting, you can turn on the “Waiting Room” by following the instructions that can be found here.
What are Waiting Rooms and how do they work?
The Waiting Room feature allows the host to control when a participant joins the meeting by placing participants in a Waiting Room prior to joining the session. It is recommended that you review your Waiting Room selections and options for ‘join before host’ (not pictured) and which participants to place in the Waiting Room.

How do I enable automatic closed captioning/auto-transcription in a meeting?
Closed captioning (CC) increases the accessibility of your Zoom meetings. When you use CC, you’re supporting students who have difficulty hearing, students whose living situations require them to keep the sound turned down or off when they’re in class, and students who learn better when they’re able to read along.
Note that only the host of the Zoom meeting who is logged into their Licensed VSC Zoom account can enable auto-transcription.
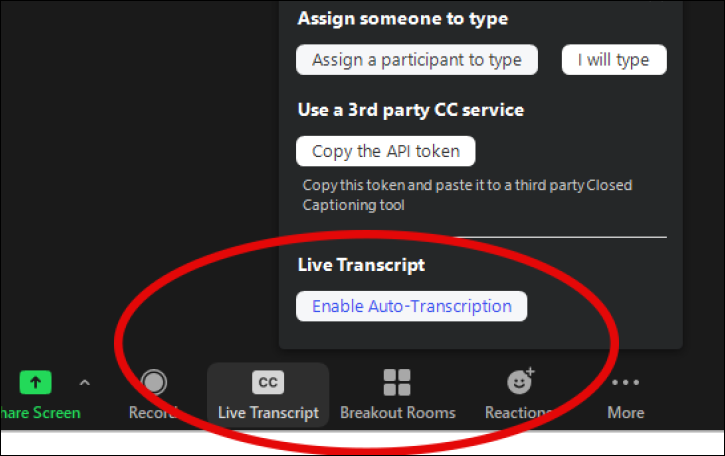
- Click the CC Live Transcript button on the control bar at the bottom of a meeting.
- Under Live Transcript, click Enable Auto-Transcription
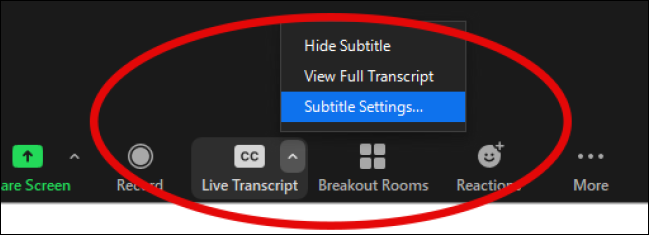
- Optionally, change subtitle settings by clicking the small arrow on the Live Transcript button and clicking Subtitle Settings…
Additional Zoom closed captioning documentation is available: https://support.zoom.us/hc/en-us/articles/207279736-Closed-captioning-and-live-transcription and https://support.zoom.us/hc/en-us/articles/115004794983-Using-audio-transcription-for-cloud-recordings-
How do I add my pronouns to Zoom?
1. Ensure you’re using Zoom 5.7 or later. Follow the How do I check for updates to Zoom? instructions, above.
2. Login to your Zoom account at: https://vsc.zoom.us/profile
2. Click Edit to the right of your name.
3. In the Pronouns field, enter your pronouns (parenthesis will automatically be added, so no need to include them here)
4. In the Share in a meeting or webinar? drop-down field, choose from the following options:
Ask me every time: You will be asked if you want your pronouns to appear next to your display name in every meeting that you host or join, and any webinars that you’re the host or panelist for.
Always share: Your pronouns will appear next to your display name automatically in any meetings that you host or join, and any webinars that you’re the host or panelist for.
Do not share: Your pronouns will not appear next to your display name in any meetings or webinars. You will have to manually choose to share your pronouns.
Note: Even if you choose not to share your pronouns in meetings or webinars, your pronouns will still appear in your profile card and be visible to your Zoom contacts if you have entered them in the Pronouns field.
5. Click the blue Save button.
Zoom Cloud Recordings
My Zoom recordings are no longer there! What do I do?
All Zoom cloud recordings are automatically pushed to YuJa. Zoom cloud recordings are deleted from Zoom seven days after the date of the recording.
Please refer to https://oit.northernvermont.edu/yuja for YuJa documentation.
Record your Meetings in the Cloud
There are two ways to record meetings to the cloud:
1. Schedule meetings in Canvas and check the checkbox to record the meeting to the cloud. When you start the meeting, the recording will start automatically. When the meeting has ended, each recorded meeting will display as links under the Cloud Recordings tab under Zoom in Canvas.
2. Record the meeting to the cloud from within the meeting. Please follow Zoom’s cloud recording documentation.
Delete cloud recordings you no longer need
1. Log into your VSC Zoom account: https://vsc.zoom.us/recording with your Portal username and password
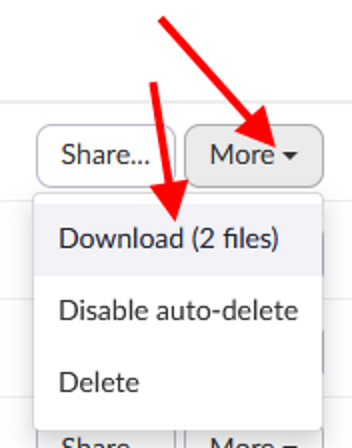
2. Determine which recordings you no longer need. Click the More button, and click Delete. Do this for all of the recordings you no longer need.
Enable automatic cloud recording deletion after set number of days
- Log into your VSC Zoom account at https://vsc.zoom.us/profile/setting?tab=recording with your Portal username and password
- Scroll down the page to find Auto delete cloud recordings after days
- Click the slider to enable this option (it’s disabled by default)
- Specify the desired time range (days). The setting is automatically applied
Turn automatic cloud recording off
- Log into your VSC Zoom account at https://vsc.zoom.us/profile/setting?tab=recording with your Portal username and password
- Scroll down the page to find Automatic recording
- Click the slider to disable this option. The setting is automatically applied.
Download Zoom recordings – preparing to move recordings to YuJa
Note: on and after March 4, 2021, all Zoom cloud recordings are automatically pushed to YuJa. Therefore, you do not need to follow these instructions for recent recordings.
Log into your VSC Zoom account at https://vsc.zoom.us/recording with your Portal username and password.
Click on More to the far right of the meeting you want to download. Click Download.
Depending on how the cloud recordings were configured when the meeting occurred, you may have more than one recording files per meeting. The recording(s) are saved to the location where the browser is configured to save downloaded files. Often, this is the Downloads folder.
Repeat this process for all of the recordings you would like to upload to YuJa.
See the next section, Bulk upload recordings to YuJa to finish moving recordings to YuJa.
For additional details, see Zoom’s Cloud recording documentation.
Bulk upload recordings to YuJa
Once you have downloaded Zoom recordings to your computer (see instructions above), you can bulk upload these recordings to YuJa.
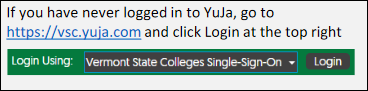
1. Login to YuJa at https://vsc.yuja.com
2. Determine the folder where you want to upload the recording. Open this folder in YuJa by double clicking on it.
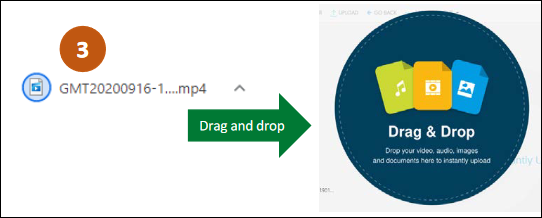
3. Drag and drop the video from your computer to the YuJa folder you just opened. If you have your Downloads folder open in another window, you can select more than one recording file simultaneously by clicking on one file, holding shift, and selecting additional files so that they are highlighted. Then, click and drag all of these recordings (while they are highlighted) to YuJa to upload all of them simultaneously.
4. It will take a few moments to load. When it’s done uploading, the video(s) will appear in a list. Hover the cursor over the video and click More… to rename, publish, and edit the video. You should also be able to test the playback of the video.
5. If all is well, please go back to Zoom and follow the Delete cloud recordings you no longer need instructions, above.
Please also refer to YuJa’s documentation on how to do this: https://support.yuja.com/hc/en-us/articles/360049059313-Bulk-Uploading
Classroom recording policy
The Classroom Recording Policy applies to all photo images, audio recordings, and video recordings of classes, regardless of software used (i.e. Zoom, YuJa, Teams, etc). The purpose of this policy is to define appropriate procedures for capturing, sharing, and protecting classroom recordings. If a student is identified or recognizable in an audio or video recording or image, this recording can be considered part of the student’s educational record and is protected by the Family Educational Rights and Privacy Act (FERPA). This policy does not apply to recordings that include only the instructor.
Any recording that includes students must be deleted after 6 months (or 180 days). Any classroom recordings beyond the current semester that include students should be deleted as they cannot be shared with subsequent classes.