
Here you will find tutorials on how to setup email/calendar(s) on your devices:
How to Setup your NVU email on the Outlook Mobile App
Below are instructions on how to setup the Outlook Mobile app for Android and iOS:
- Download the Outlook app from the Google Play store or from the Apple App store.
- Tap Get Started if it’s your first time. Or, go to Settings > Add Account > Add Email Account.
- Enter your email address in the following format. username@nvu.vsc.edu(i.e. abc12340@nvu.vsc.edu
- You will be met with the VSC portal, login with your NVU username and password.
- Outlook may request permission to access your calendar, contacts, etc… Select Yes or Allow.
- You are now ready to check your NVU email on your mobile device!
Accessing your email via a web browser
Below you will find instructions on how to access your NVU Email via a Web Browser:
- In your web browser’s address bar enter the address, https://northernvermont.edu/email
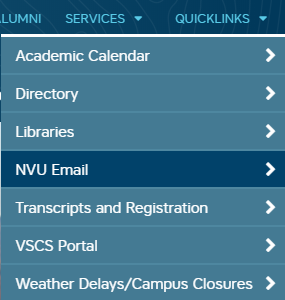
- Alternatively you can access your NVU email directly from https://northernvermont.edu by hovering over Quicklinks in the top right of the page and then selecting NVU Email
How to Setup an email signature in Outlook
Note: If you use Outlook on a web browser, Outlook on your smartphone, and/or the Outlook desktop program, you’ll need to create a signature in each. To create and use email signatures in Outlook on the web, see Create and add an email signature in Outlook.com or Outlook on the web.
To create your signature and choose when Outlook adds a signature to your messages follow the instructions below:
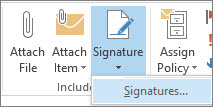
- Open a new email message.
- On the Message tab, in the Include group, choose Signature > Signatures.
- Under Select signature to edit, choose New, and in the New Signature dialog box, type a name for the signature.
- Under Edit signature, type the signature.
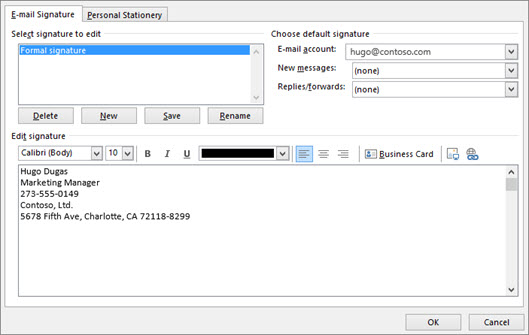
- You can add links and images to your email signature, change fonts and colors, and justify the text using the mini formatting bar under Edit signature.
- You can also add social media icons and links in your signature. For more information, see Insert hyperlinks to Facebook and Twitter in your email signature.
- Under Choose default signature, set the following options for your signature:
- In the E-mail account list, choose an email account to associate with the signature. You can have different signatures for each email account.
- In the New messages list, choose the signature that you want to be added automatically to all new email messages. If you don’t want to automatically add a signature to new messages, choose (none).
- In the Replies/forwards list, choose the signature that you want to be added automatically (auto sign) when you reply to or forward messages. Otherwise, accept the default option of (none).
- Choose OK to save your new signature and return to your message. Outlook doesn’t add your new signature to the message you opened in Step 1, even if you chose to apply the signature to all new messages. You’ll have to add the signature manually to this one message. To add the signature manually, select Signature and then pick the signature you just created.
To add a logo or image to your signature follow the instructions below:
- Open a new message and then select Signature > Signatures.
- In the Select signature to edit box, choose the signature you want to add a logo or image to.
- Select the Image icon shown below:

- Locate your image file, and select Insert.
- To resize your image, right-click the image, then choose Picture. Select the Size tab and use the options to resize your image. To keep the image proportions, make sure to keep the Lock aspect ratio checkbox checked.
- When you’re done, select OK, then select OK again to save the changes to your signature.
How to Share a Calendar in the Outlook desktop app
Below are instructions on how to share a calendar with another person at NVU or within the VSC:
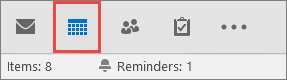
Click Calendar.
- Select the Calendar Icon
- Right click on the calendar you would like to share & select Calendar Properties dialog box,
- After doing this, click on the permissions tab & click Add.
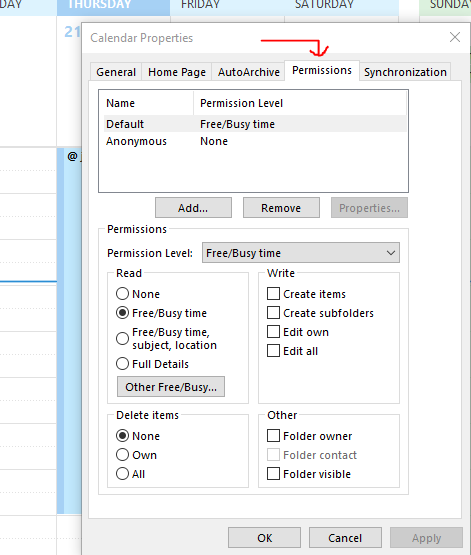
- You can search for people from your address book or type in their email addresses in the Add box. When you’re done adding names in the Add Users dialog box, click OK.
Schedule Zoom meeting with Outlook web browser
1. Open your web browser and navigate to https://outlook.office.com Type in username@vsc.edu and click Next. Sign in with your Portal username and password.
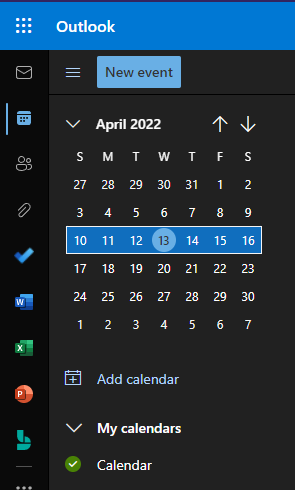
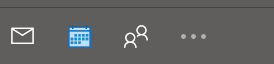
2. Click on the Calendar icon in the upper left. Select the calendar on the left that you want to add a meeting invite to. Click New Event
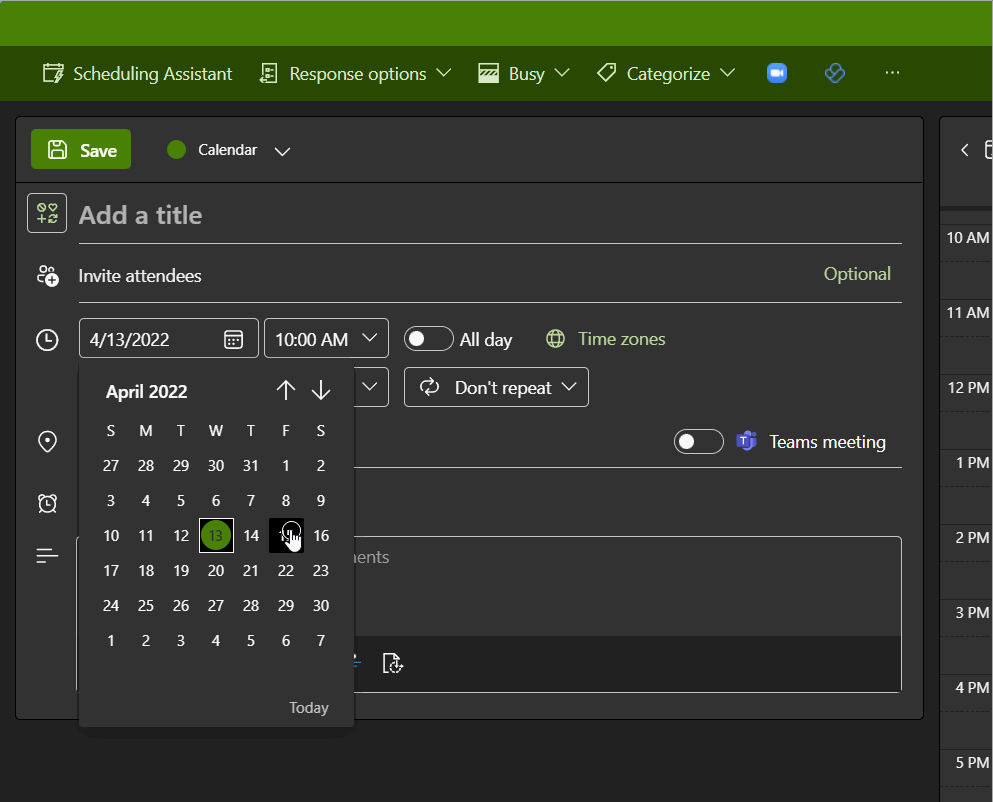
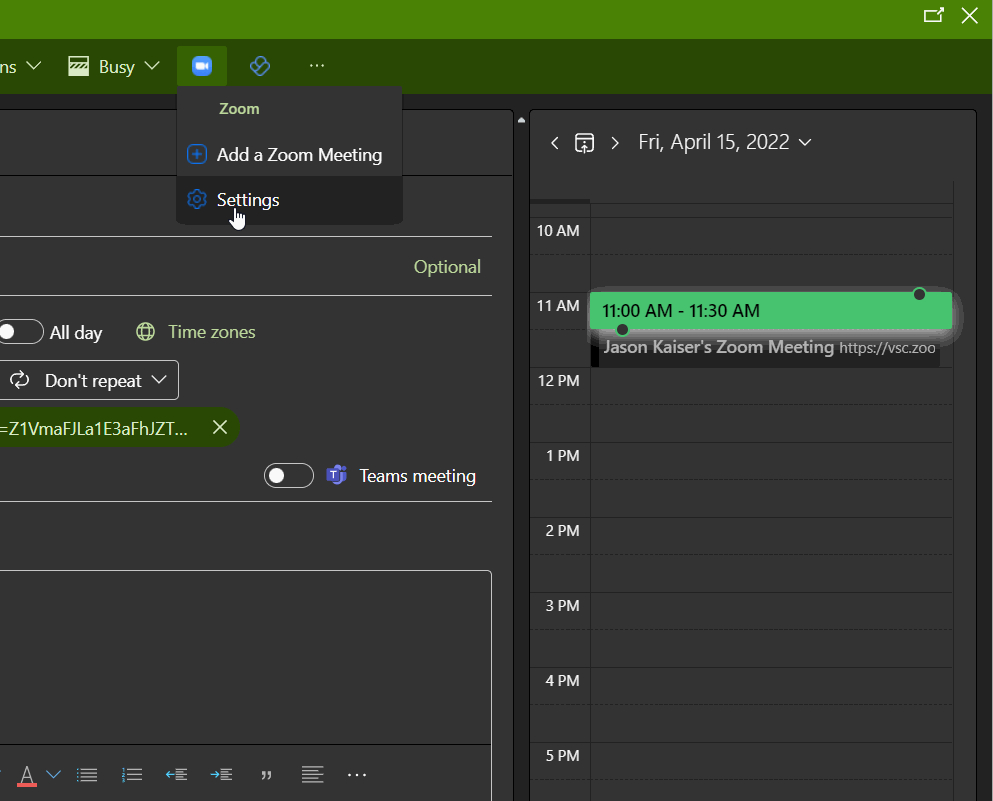
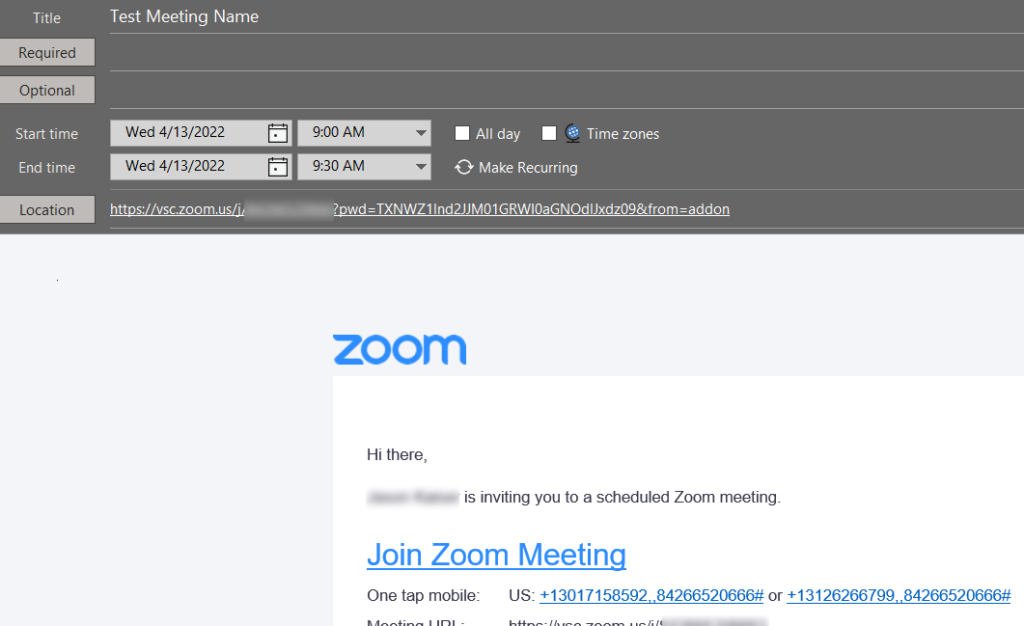
3. Change the date and time to the desired date and time for the meeting. Add a title to name the calendar invite. Click on the Zoom icon at the top of the window, select Add a Zoom Meeting.
4. First time only, otherwise skip to step 5.
Click Allow. If prompted, scroll down and select SSO, type in VSC for the company domain. Sign in with your Portal username and password.
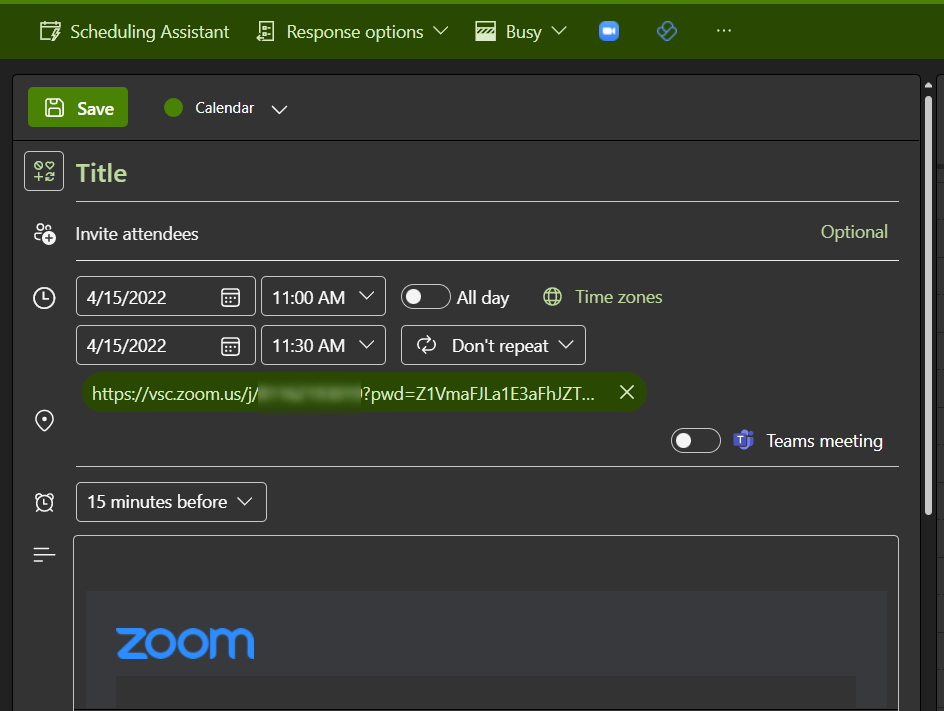
5. The Zoom meeting link is added to the Location field, and the body of the invite is populated with the Zoom meeting information.
6. Optional
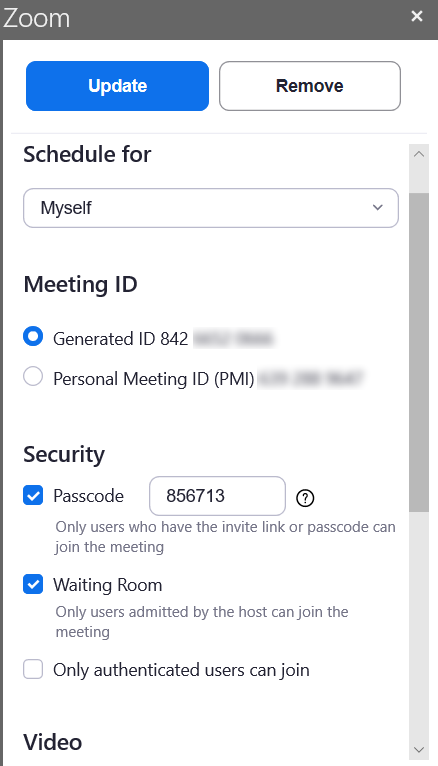
Change Zoom meeting settings by clicking on the Zoom icon
Click ⚙️Settings
Change any desired settings, such as scheduling for someone else, using Personal Meeting ID, setting a Passcode, enabling a Waiting Room, etc. When you are finished making changes, click Update
7. In the Invite Attendees field, type in the name of a Required (default) attendee(s), and/or click Optional to add optional attendees. Suggested contacts will be shown. If you don’t see the person you want, start typing in their name. Click Save.
Video Tutorial
Schedule Zoom meeting with Outlook desktop App
1. Open the Outlook desktop application and click on the Calendar icon (see below for separate Outlook web browser tutorial). On the left-hand side, select the calendar you want to add a meeting invite to.
2. Click New Meeting in the upper left

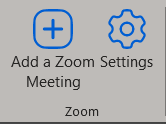
3. Click Add a Zoom Meeting along the top of the window.
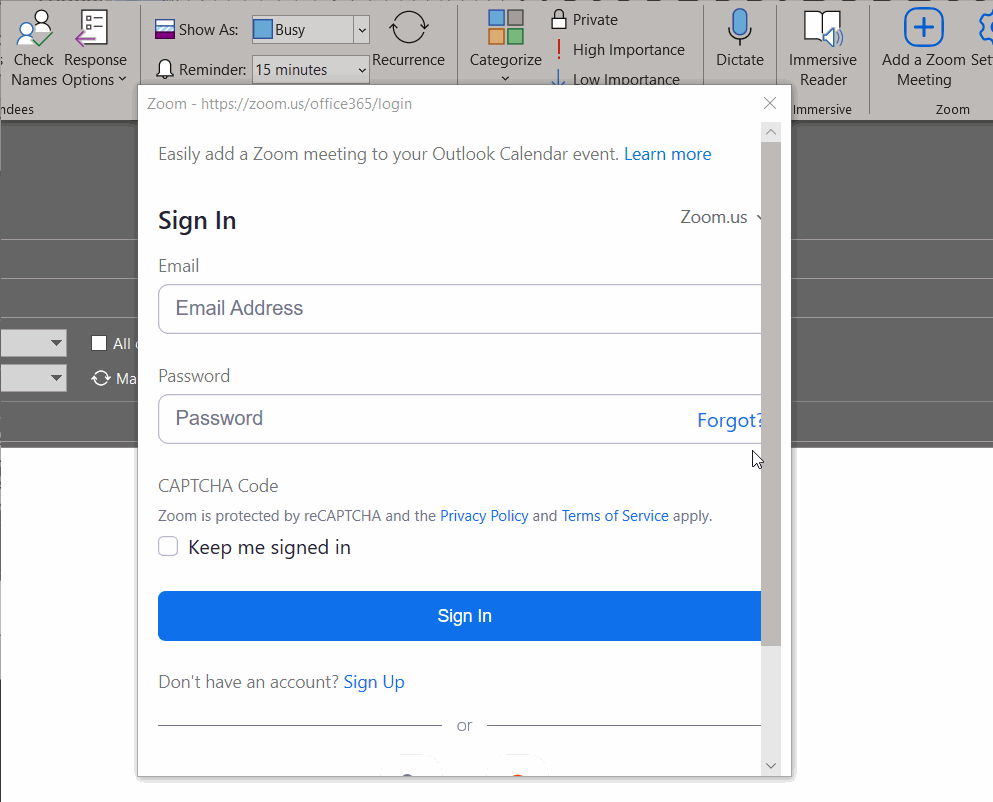
4. First time only, otherwise skip to step 5.
Scroll to the bottom of the window that opens, and click on the SSO button. Type in VSC for the company domain, and click Continue. Type in your Portal username and password and click Sign In
5. The Zoom meeting link is added to the Location field, and the body of the invite is populated with the Zoom meeting information. Change the Title of the meeting, if desired.
6. Optional
Change Zoom meeting settings by clicking on ⚙️Settings next to Add a Zoom Meeting
Change any desired settings, such as scheduling for someone else, using Personal Meeting ID, setting a Passcode, enabling a Waiting Room, etc. When you are finished making changes, click Update
7. Type in Required and/or Optional attendees names, and click Send
